Archive for March 2013

Hearts a Flutter

Friday, March 29, 2013


I've been working on finishing the heart quilt this week.  I bought this top a while back to practice my quilting.  I love working on my own quilts, but sometimes I just need a top to practice with.  I'm less emotionally invested that way.  


I tried a few things until I settled on the quad heart design on right.  I started by stitching in the ditch on all the sashing.  Then I FMQ'd all 9 sets with the hearts.  I was afraid they'd be all different sizes and shapes, but they're all actually pretty close.

Hubby also serviced old reliable.  I'd had a little issue with it during the last quilt group meeting.  He wanted me to give it a little practice run.  This little rectangle is the result.


I also started working on the Heart and Feather whole cloth quilt from Leah Day's 2012 project.  I used the glass window tracing method.  I can tell you two things: 1. I hate the pen I used. 2. I wish I had a light box.  At least it's done.  Now, if I could only get to it before the ink disappears!

Well, I've got lots more quilting to do.  I'd better get back to work.

Quilt. Create. Enjoy!

Anna

PS: You may have noticed I like the dancing flowers (my name) design.  I think I'll be ordering fabric or even better, looking through my stash, to get some designs under my belt.  I want my go-to quilting designs to be as varied as the fabrics I use.

PSS: I just got back from singing at Easter Vigil Mass a little while ago.  I am filled with the Spirit!  Have a great Easter!!!

Add a comment »

Jelly Roll Race

Monday, March 25, 2013

My quilting group had a great time with a jelly roll race last Tuesday.  All but two of us were able to finish the tops before the end of the evening.

I got the borders on Friday night and picked up the backing fabric on Saturday.

It's a little hard to tell from this picture but the middle border is purple and the final border is pink.  The detail one shows it a little better.

You can also see the backing peaking out on the bottom right side.  It's a little too much pink & purple for me but I think my niece will love it.

Here are the other quilts from Tuesday night.


I also picked up the borders for my Barbara's Antique quilt - red, gray, & black. The backing is black too.

So many great quilts to work on, I'm having a hard time deciding what to do next!

Quilt. Create. Enjoy!

Anna


Add a comment »

I Did It!

Sunday, March 17, 2013

A quick note before we start choir practice.

I Did It!

I'll pick up the borders next Saturday. I'm very excited! Hubby says it reminds him of a squared off sun. I think it's a bit like parts on the back of a circuit board. All thoughts in naming.

Quilt. Create. Enjoy!

Anna

Add a comment »

Don't Get Carried Away

You know the point in the quilt making process when everything is coming together and you start getting really excited about finishing the quilt top?

Well, this is where I will normally make my mistakes.  Yesterday was no exception.  I'm working on my next UFO.  I have a great pattern by Debbie Caffrey - Barbara's Antique.  I loved the look of it and it was a great opportunity to use one of my fabrics in a different way.  I love Robert Kaufman's Fusions and tend to use them as background fabrics.  Fusions is the only fabric I used in the blocks.  There are so many colors available that I could easily pick 10 sets of fat quarters in light and dark.  I used the Fusions Spray & Fusions Vine in various colors.

Not Quite Ready to Name It
The blocks have been done for 2 + years. When I started working on finishing projects in January, this is one of the first ones I started with.  I squared up the first row.  Then thought, Hey, I should put together the first row to see what it will look like.  Not content to leave patterns as they are, I decided to add a sashing. Repeat with the next two rows.  Now I had 3 rows...hmmm...I should put them together to see how it's shaping up.

In my rush to see the finished product, I must have sewn, ripped, sewn, ripped, sewn, ripped the three rows together many times. Pins, who needs to pin?  Ooops, my rows aren't lining up on the column. Humpf! Rip.  Hmmm...I attached that sash to the wrong side.  Rip.  Oh boy!  That sash was on the right side and now I've attached it to the wrong row because I lost a counting pin in row 3 and thought it was row 2.  I should have trusted my gut and known I wouldn't have put the oranges that close together.  Rip.  You get the idea.

So yesterday's project was to finish at least the first three rows so I can get back on track.  Mission accomplished!  It was so frustrating, but as I look at how it's coming along, I'm really happy with my color choices and the decision to add the sashing.

Today's goal: Get the last two rows done.
Secondary goal: Add the side sash.

As long as I don't get carried away by the excitement of finishing this top, I should be far less mistake prone!

Quilt. Create. Enjoy!

Anna

PS: Any thoughts on how to quilt the blocks?

Add a comment »

Even A Little Practice Makes Perfect

Friday, March 15, 2013

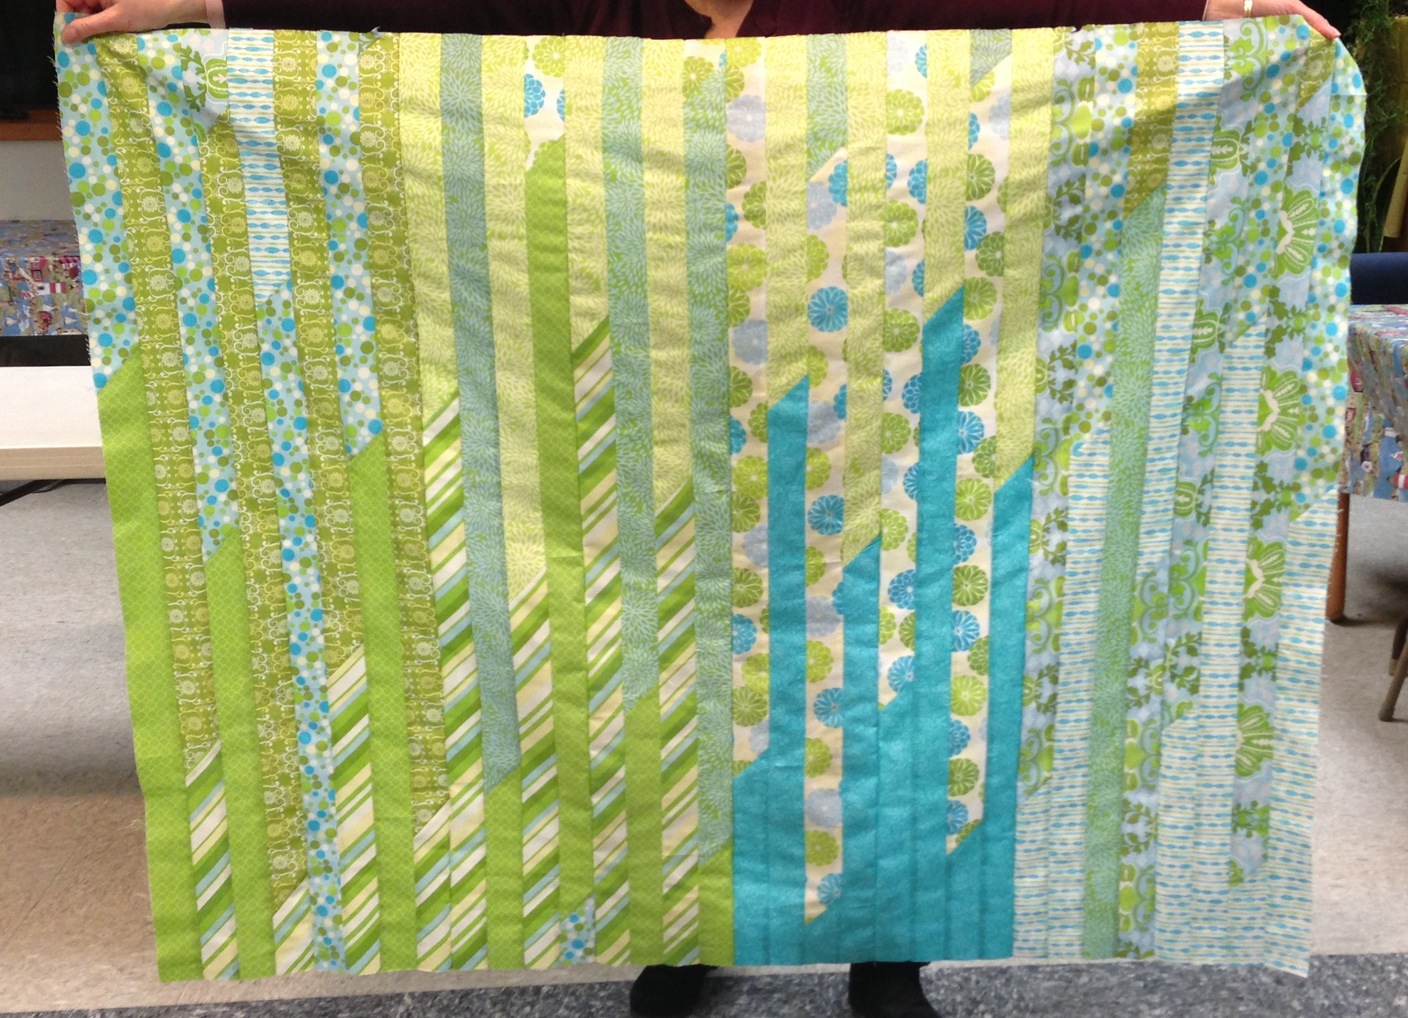
So I started my weekend with a plan.  I've had this quilt top for a while now.  I bought the finished top at a LQS.  I thought it would be a perfect opportunity to concentrate on the quilting instead of the piecing.

Winter Themed Quilt Top
That was about a year & a half ago.  In that time, I've stared at it, moved it to different rooms, held it, hid it, hung it, draped it and tried just about everything I could think of to help me decide how to quilt it.

This was the weekend I was going to decide.  So on Friday I draped it on the back of the couch, sat at my desk with graphing paper, and started sketching out a design.  I didn't have anything in mind, but I knew the size, shape, and design of the quilt so that's where I started.

Winter's Whimsy
By late afternoon Saturday I had this design sketched.  The right column took me the longest to work out.  I needed to keep the rows and columns balanced while doing a different design in each block.

I figured the sashing and border would be the easiest to decide on - Ha!  The sashing went fairly quickly, but the border took forever to decide on.  With several pencils, a pencil sharpener and my trusty Staedtler eraser, I was able to get it all worked out.

I taped the drawing to the wall and lived with it for a while.  I think it all ties together quite nicely.  I named it and was ready to start quilting.


Well, even the best plans can hit bumps in the road.  Unfortunately, both spool caps for my Baby Lock Audrey went missing last week.  I'm fairly certain Camille got to playing with them and has hidden them somewhere.  Hubby and I searched for a good long while and then again before giving up.  I've ordered new ones, but until I get them, Audrey has been put away.

Yup, she is sitting on the extension table!

Not to worry, hubby to the rescue.  He brought my Kenmore sewing machine, Old Reliable, downstairs for me to use.

Old Reliable with A Little Practice Makes Perfect I 

This is the first birthday present he gave me almost 20 years ago.  He also got me the Audrey when a car accident made it difficult to move Old Reliable around - It's a little heavy.  With Audrey around, Old Reliable has been in a travel bag.  The little mug rug quilt on top (A Little Practice Makes Perfect I) is the test piece I used to make sure all was still running as it should be.  To keep myself in good habits, I put a label on it and have finished binding it.  It still works as if it were brand new!

Now I had a decision to make: Do I start working on Winter's Whimsy or do I work on something else?  All the excitement of searching for the spool caps, putting Audrey away, setting up Old Reliable, running to church to cantor mass...well you get the idea.  I decided to quilt something with a little less pressure involved.

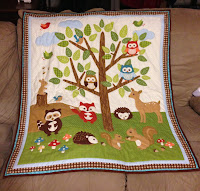
God's Forest Critters
I picked up this flannel panel in January at Quilter's Attic in Pine Bush, NY.  It's Forest Friends by Mint Blossom for Northcott.  I don't have anyone to give it to but I thought it was so cute.  I FMQ'd around everything except the birds and the bees, so the critters, clouds, mushrooms, tree and owls are all a little puffy.  I "ditch" stitched the borders which are part of the preprinted panel.  I also wanted a little something extra so I added a folded strip of the background fabric to the quilt edge before putting on the binding - like a piped binding without the cording.  Flannel front, flannel back, and 80/20 batting makes it nice & cozy.  I put the binding on and a label - all done!

Not So Piped Binding & Corner Label

So I did get some quilting done in the last week with each project an FMQ opportunity to try something new and practice FMQing.  I also did a few new other things.  I sketched out a full FMQ quilt design, put the quilt labels on in different ways, and, of course, the not so piped binding.

I'll likely be posting through the weekend.  I'm unpacking my new Baby Lock Crescendo between sentences so there will definitely be several a few more practice pieces and maybe even a full quilt.

Quilt. Create. Enjoy!

Anna


PS: I also started a Goddess Mini Quilt using Leah Day's Free Motion Quilt Project Express Your Love pattern but Camille got sick on it so I threw it out.  Luckily I hadn't started any of the quilting yet.  I'm going to finish up a few other things before I start working on her again.  I want to make a few of them as gifts.  The micro-FMQ'ing should be interesting.

********

I've obviously got to start posting more often.  This seems a little long to me.

2 Comments »

Practice Makes Perfect 1

Friday, March 8, 2013

January 1st I started quilting again after a 2 year hiatus.  

Every year for MLK weekend, my local quilting group has a weekend retreat in upstate NY.  I had a few blocks to get ready for our block swap and some projects I wanted to work on so I had plenty to get me started.

During the weekend, one of the other quilters mentioned her goal for 2013 was to complete one UFO a month.  I thought this was a pretty good goal so I decided to join her.

Since January 19th, I have completed:

  • 1 over sized twin quilt top - UFO
  • 1 jelly roll race that I added mitered borders to - New
  • 1 over sized wall hanging/undersized lap quilt adapted from a pattern - New
  • Moved two more twin size quilt tops closer to completion - UFOs
  • Designed two new queen size quilts
and
  • Decided I'm going to try to never use a long arm quilter again.
Yup, you read that correctly.  After listing out all the projects I had planned for the next 6 months (UFOs & New), there were 13 quilts with most of them at the Full to Queen size range.  As many of you may have already figured, this seemed quite cost prohibitive if I had to send them all out.

With my hubby's encouragement, I began my quest to finish all my quilts, with all the custom, intricate quilting I had come to love.  I read through all my quilting books, bought some more quilting books, spent a lot of time searching online for quilting patterns and started searching for a new, larger sewing machine.  The machine search is a a story for another day.  Today I wanted to share quilting.

My first go free motion quilting is Practice Makes Perfect I.


Practice Makes Perfect I, Anna Hemsworth
It's not perfect but it is mine.  I created it using designs from Leah Day's Free Motion Quilting Project for the blocks.  The borders were a mixture of sources and original designs. Leah has a wonderful collection of over 365 free motion quilt designs and some great tools in her online quilt shop.  Her blocks are arranged in various ways including by difficulty.  My goal for Practice Makes Perfect I, was to pick one design from each difficulty level.  If you aren't already following her or popping in every once in a while, I highly recommend you do.

I also printed a fabric quilt label for the back.


I'll be back filling some of the quilts I've finished since the MLK weekend in the coming weeks, as well as sharing my Practice Makes Perfect quilts.

Quilt. Create. Enjoy!

Anna


3 Comments »
Powered by Blogger.